How to Use the Workflow Mapper: From Brain Dump to Automation Plan
The Workflow Mapper is the tool we wish we had every time a client said "we want AI" and could not yet say where. You describe your work in your own words. It gives back a map, a scoreboard, a list of wastes, ranked recommendations and a canvas you can edit by talking to it. Here is the whole thing, step by step, with real screens.
Step 1: Brain-dump, do not structure
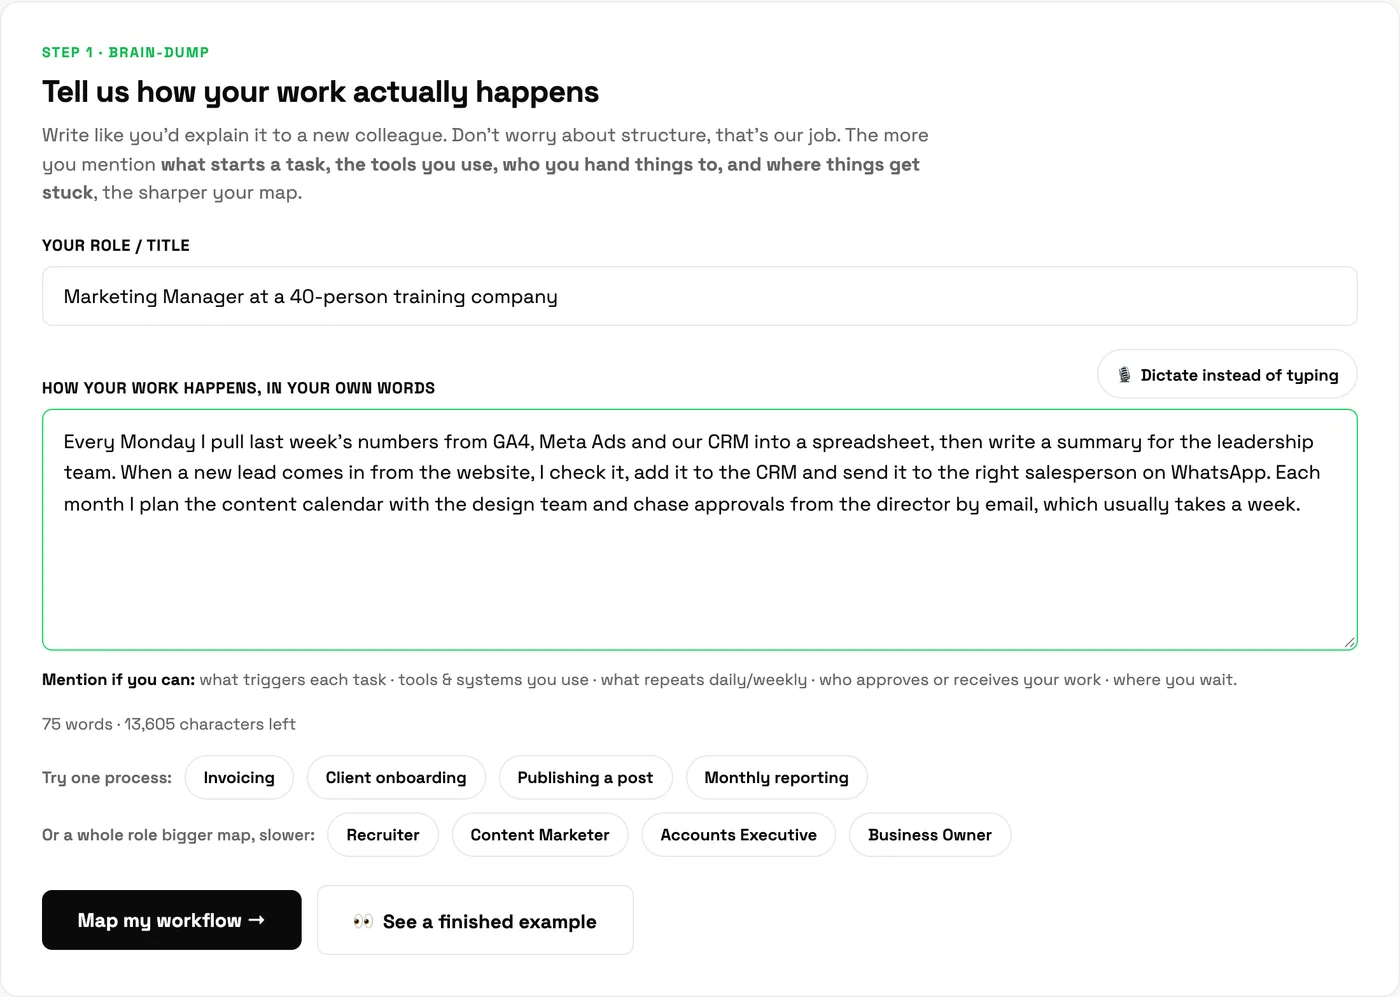
Two fields: your role, and how the work actually happens. The instruction on the page is the whole trick: write like you would explain it to a new colleague. Do not bullet-point it. Do not tidy it. The mess is the data.
The description that produces the best maps mentions four things: what triggers each task, the tools you use, what repeats, and who approves or receives your work. If you are stuck, the chips under the box load a single process (invoicing, onboarding, monthly reporting) or a whole role (recruiter, accounts executive, business owner).
Step 2: Read your map
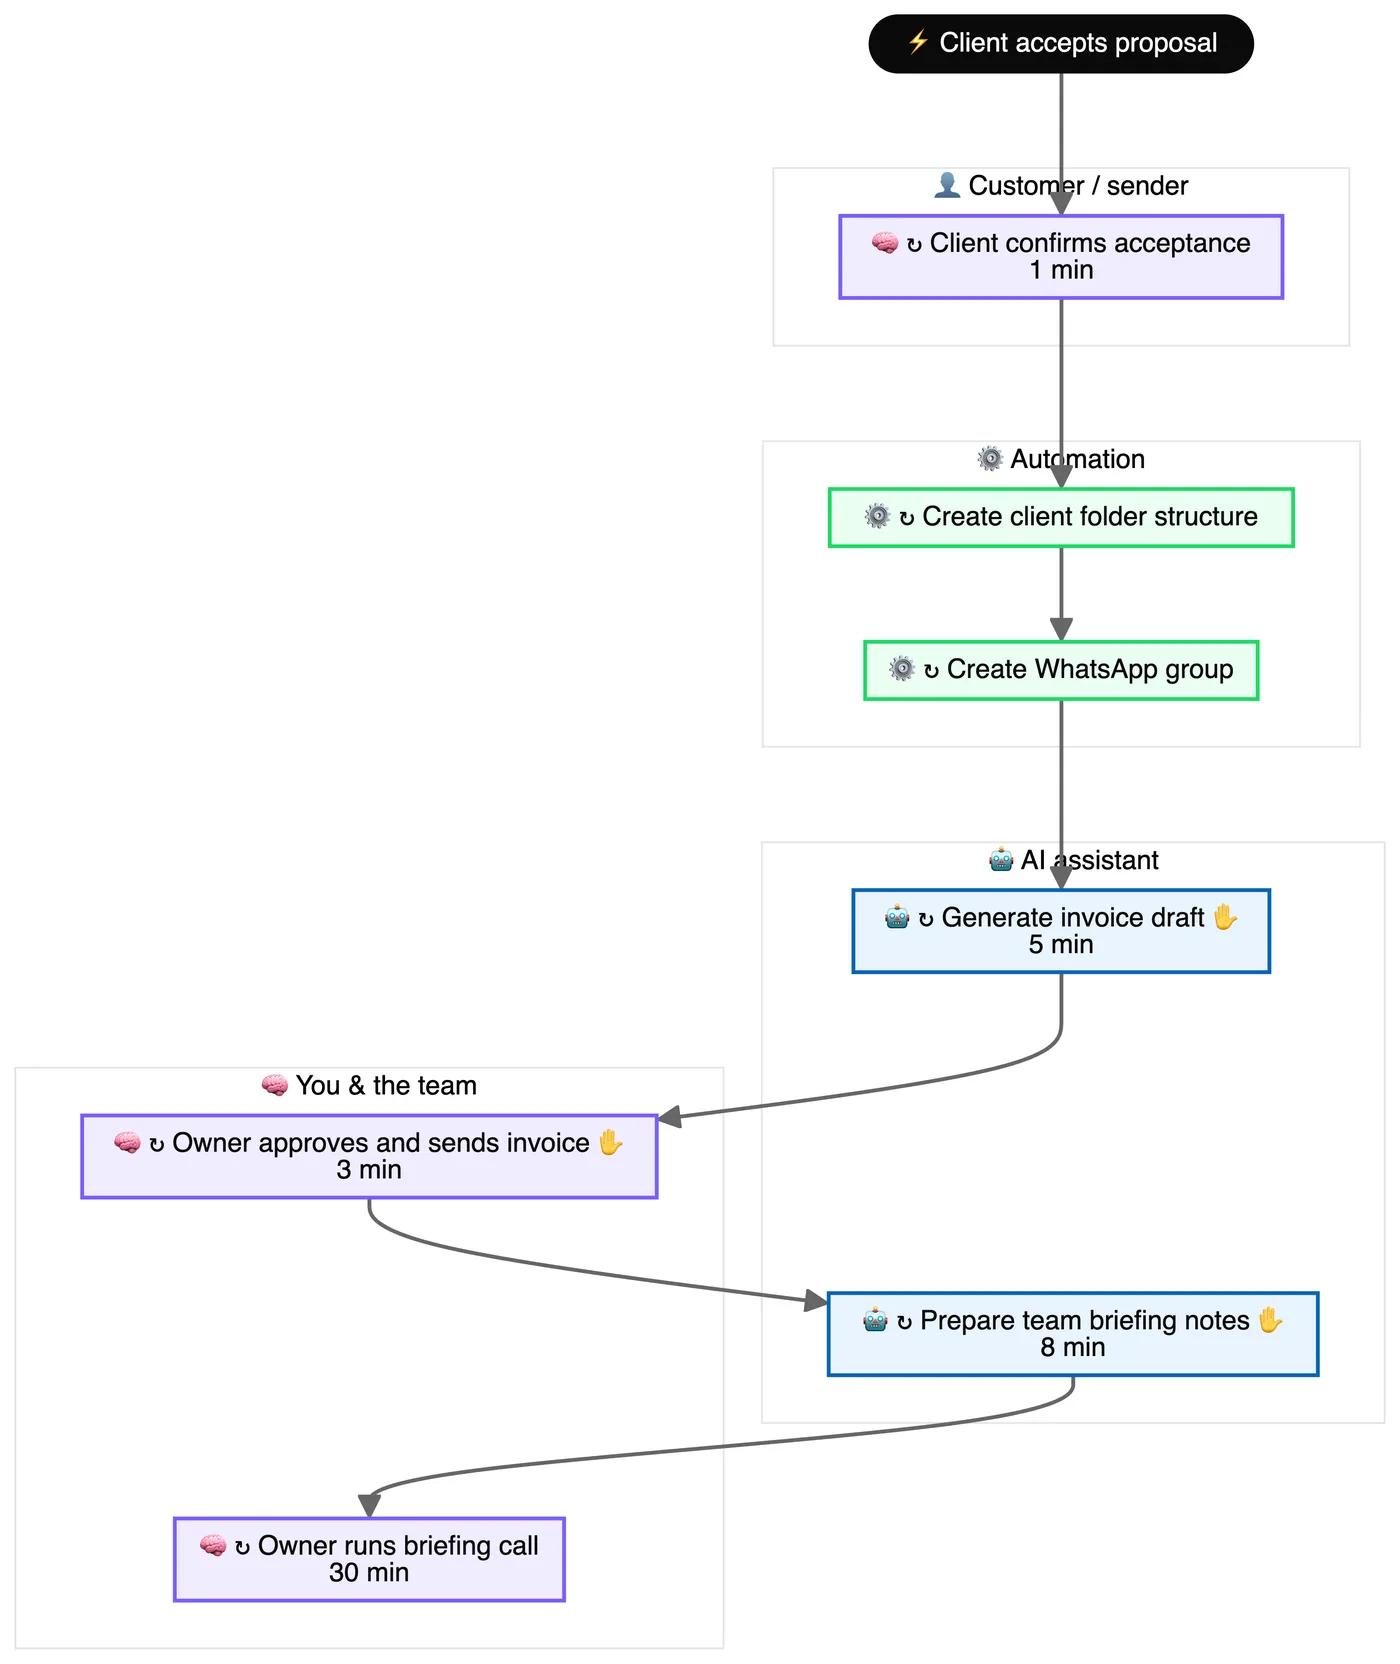
The mapper turns your description into structured workflows: a trigger, steps in order, who does each one, inputs, tools, outputs, decisions and blockers. Then it draws them. The model never draws the diagram directly; it produces structured data and the page renders the diagram from that, which is why the maps are consistent and editable.
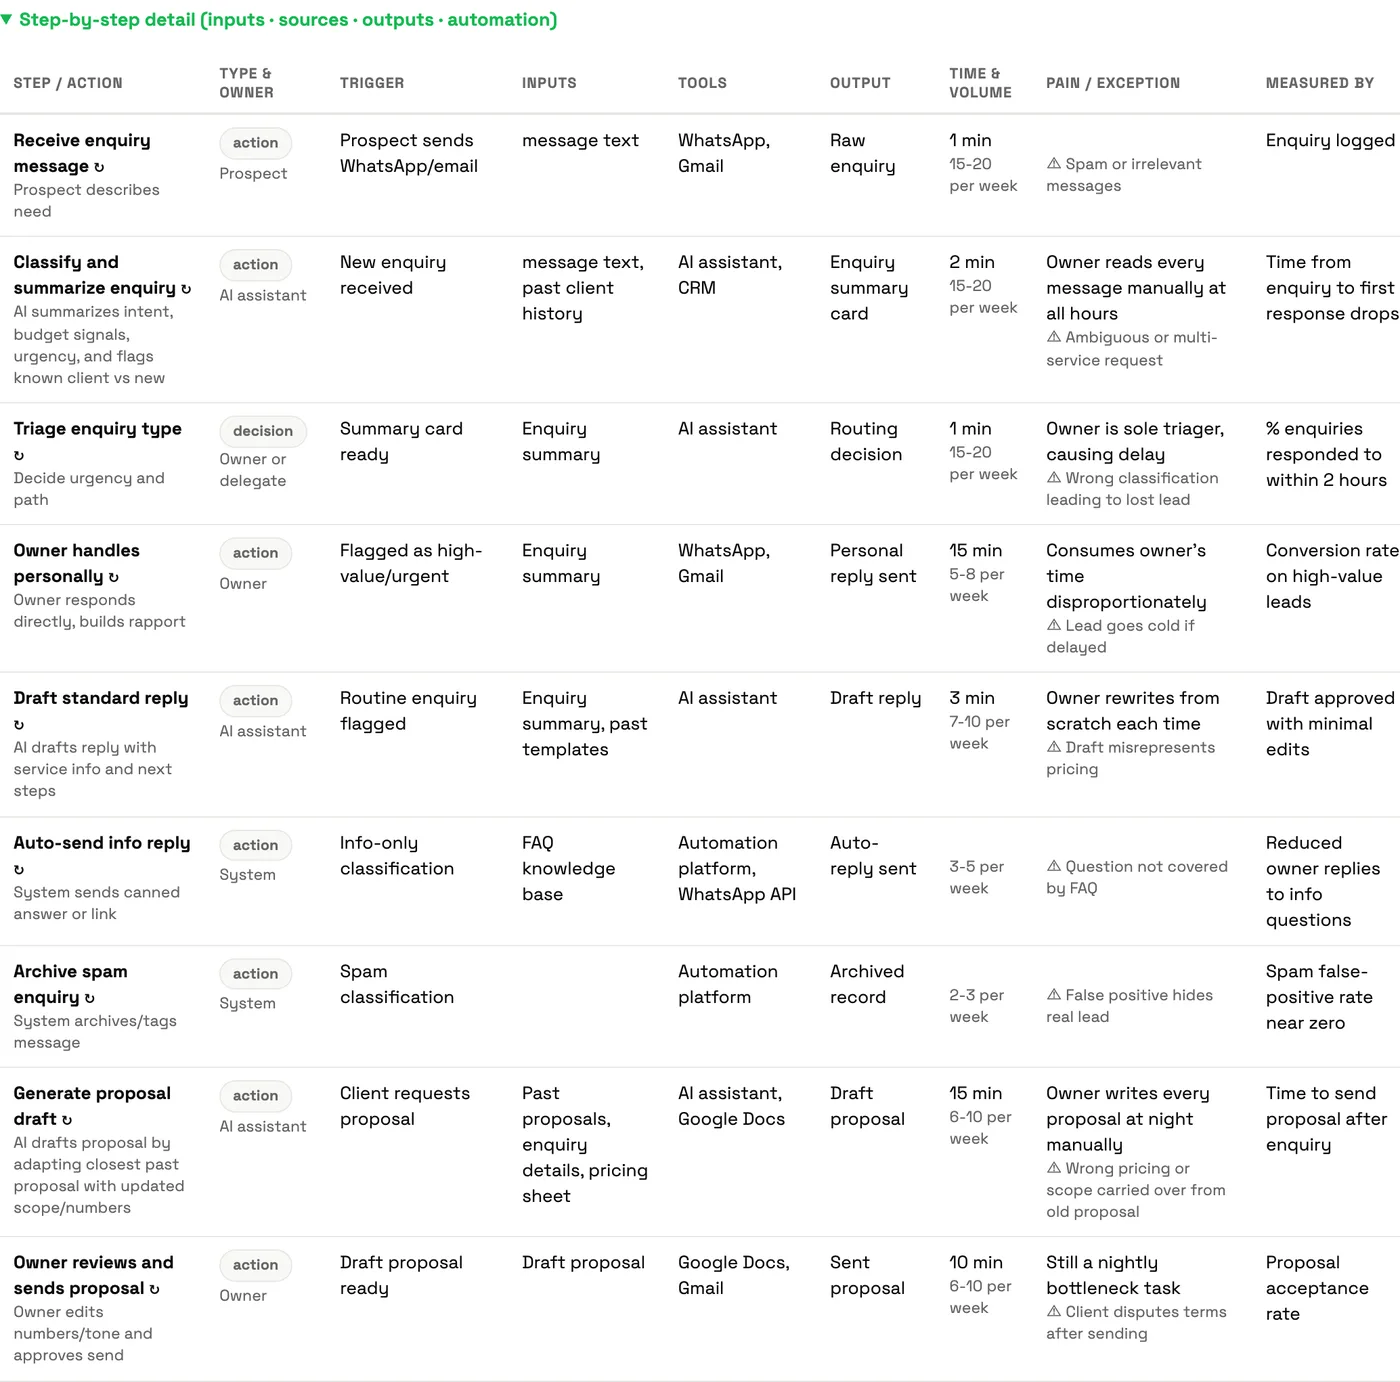
Open "Step-by-step detail" under any diagram and you get the full table: trigger, inputs, tools, output, time and volume, the pain point, the exception to watch, and how you would measure improvement. This table is the specification an automation will eventually be built from.
Step 3: Answer the gap questions
Your first description always leaves things out. The mapper notices what is vague ("who decides whether an enquiry is high value?", "what happens when the client does not reply?") and asks a few targeted questions. Answer them and refine: the map gets sharper each round. This hybrid of free description plus targeted interview is how a good consultant works, compressed into a minute.
Step 4: Read the leverage report
This is where the map earns its keep. The scoreboard shows your role in numbers:

Below it: the ECRS recommendations ranked by return, the wastes with evidence, three or four quick wins, the numbers worth measuring, and a "north star", one sentence describing what your role looks like once the plan is done:

Step 5: Edit it on the canvas, by talking to it
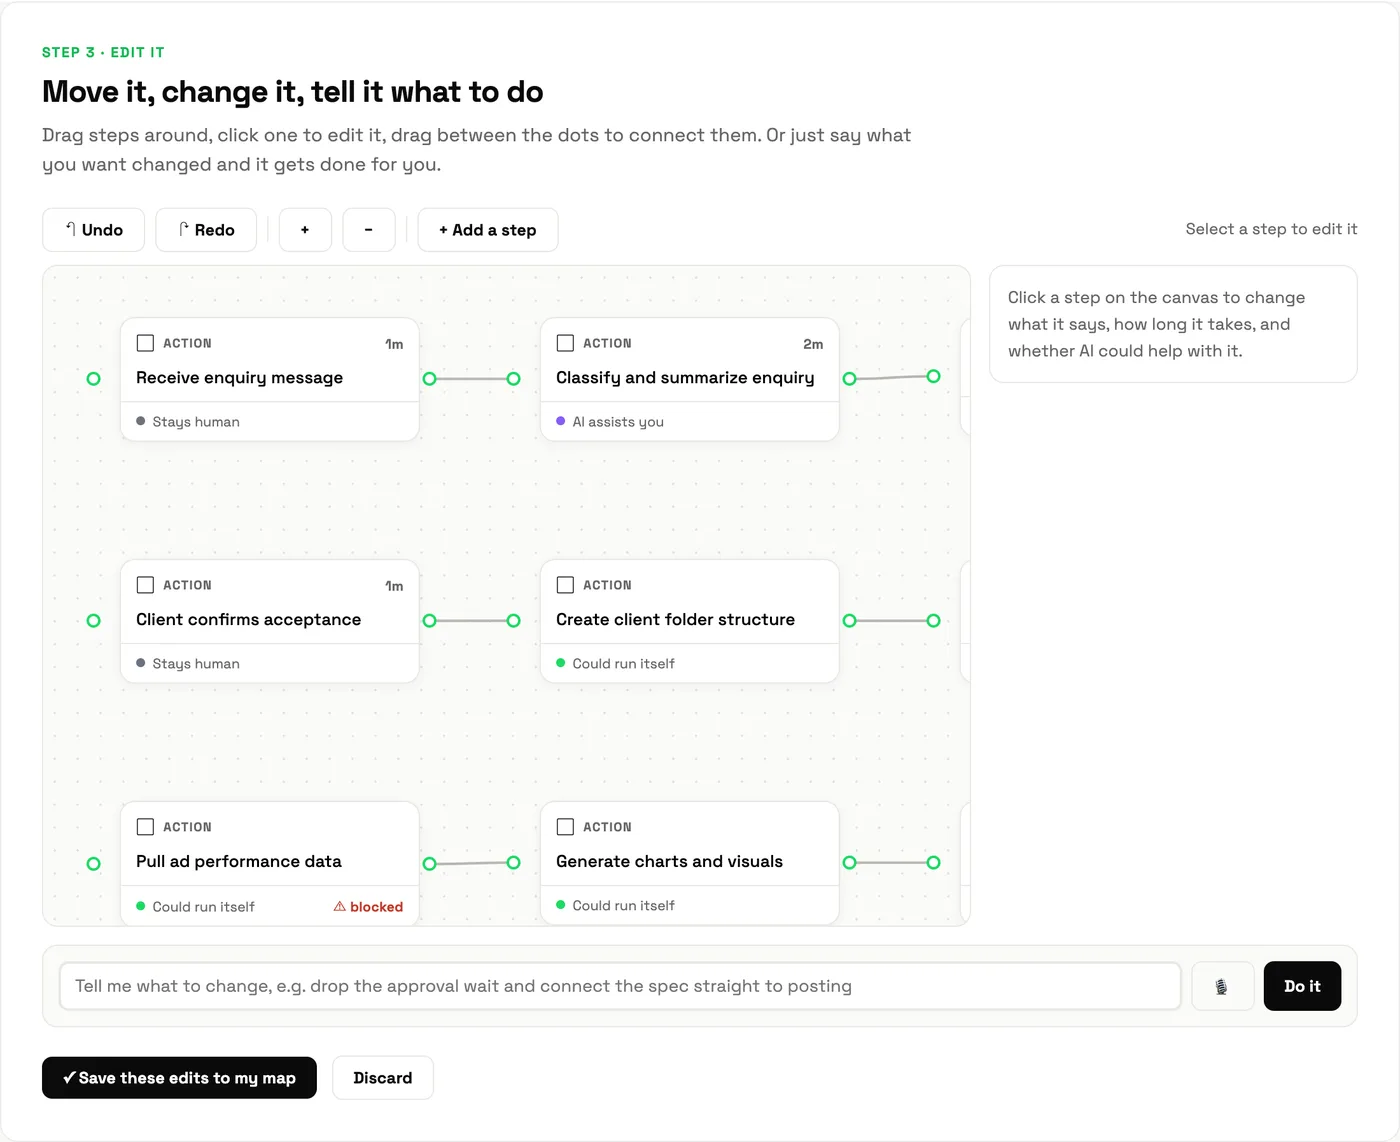
Maps are never right first time, so "Edit on canvas" opens every step as a card you can drag, reconnect or edit. Or type what you want: "drop the approval wait and connect the spec straight to posting." An agent applies the change to the map itself, so the diagram, the share link and the exports all update together.
Step 6: Hand it to an agent
Here is the payoff of mapping first. Once a workflow is mapped, tagged and cleaned, building the automation is the short part. The steps marked "could run itself" become an automation's nodes. The steps marked "AI assists" become an agent step with a human check. The steps marked "stays human" stay exactly where they are. You can export the structure for workflow automation builders, and we show the whole journey in from map to machine. If you have never built an automation, practise in the Automation Lab first.
Learn it with Cocoon
The Workflow Mapper is free because we would rather you arrive at a workshop with a map than without one. In a Cocoon session, our trainers take your map and turn it into working automations with your team in the room, on your tools. It is the reason organisations across the region call Cocoon their AI training and upskilling partner. See our programmes or book a call.
Frequently asked questions
Is the Cocoon Workflow Mapper free?
Yes. You describe your work, it draws the map and writes a leverage report. There is also a finished example you can open without generating anything.
How long does a map take to generate?
A standard map usually takes under a minute. The deeper whole-role map can take a minute or two because it maps several workflows at once.
Can I edit the map after it is generated?
Yes. "Edit on canvas" lets you move steps, change their details, add steps, or type an instruction such as "drop the approval wait" and the change is applied to the map.
Can I share or export my map?
Yes. You can download each diagram as an image, create a share link to a read-only copy, and export the structure for use in workflow automation tools.
It is free, and you only need to describe your work the way you would to a new colleague.
Open the Workflow Mapper →